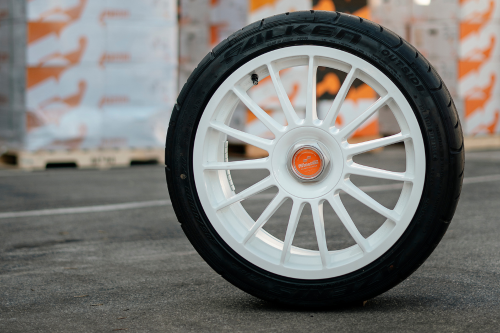
How to Install Our Super Touring Series Wheels
So you finally pulled the trigger and picked up a set of your dream Super Touring Series wheels from Fifteen52. (Congratulations, by the way.) Shopping for a new set is only half the fun though, now that they've arrived safely at your door, it's time to get them on your ride. As you can probably tell by the time you’ve unboxed your new wheels, these are a little more complex than your typical bolt holes and lug nuts for installation, but don't worry – we've gone ahead and created a step-by-step guide along with an instructional video to make it easy for you!
Follow the steps below to ensure a smooth and successful installation:
Step 1: Remove all Lug Cap System parts from the wheels
Before we get started, let's take off all the Lug Cap System parts that come pre-installed on your
wheels. You will find the following components on each wheel: An Anodized Hex nut or Tech nut
with O-rings, a Threaded Snout, a Cover Plate, a Center Cap, and a Set Screw with Hex Key. Set
these parts aside for now. We'll use them later, after you mount and balance your tires.
Speaking of which...
Step 2: Mount and Balance your tires
It's time to mount and balance your tires onto the bare Super Touring wheels. For the best
results, we recommend using Road Force balancing, as it minimizes the need for additional
wheel weights. This will ensure a smooth and vibration-free ride, as well as reduce any
potentially unsightly wheel weights on your beautiful new Super Touring wheels.
Step 3: Install the Threaded Snouts into the wheels
Before starting this step, we recommend you put on a pair of mechanics gloves. We'll now
install those Threaded Snouts we set aside into the center of each wheel. Start by threading the
snout into the wheel's center. Keep tightening until it's securely in place.
Next, locate the small hex head set screw and insert it into the hole in the snout. Take the
provided hex key and tighten the set screw until it's hand tight - nice and snug, but no need to
overdo it. To make accessing the set screw easier, you can temporarily remove the center cap
from the threaded snout (if you haven’t done so already while you were inspecting how nice all
of these high-quality parts are).
Step 4: Install the wheels onto your vehicle and add the remaining accessories
Now that the threaded snouts are in place, it's time to install the wheels onto your vehicle. Jack
up your car, (always prioritize safety when doing an install yourself. Be sure to use jack stands or wheel curbs to support the weight of your vehicle) and let’s begin the heavy lifting. If necessary for your application, install the hub centering rings (sold separately) first. Next, carefully mount the wheels onto your vehicle's hubs. To ensure a proper and safe fit, torque your lug nuts/lug hardware (sold separately) according to your OEM torque specifications. This will ensure the wheels are securely fastened to your
vehicle. Remember to re-torque them after a brief drive for added peace of mind.

wheels look so unique. Use a Hex nut wrench or Tech nut wrench (sold separately) to tighten
the nuts and fully compress the O-ring for a secure installation. This will give your wheels that
sleek and finished look. And that's it! You've successfully installed your Super Touring Series wheels. Now it's time to hit the road and enjoy the enhanced performance and style they bring to your ride. Don’t forget to tell everyone where you got them and tag us on socials. We love to see your builds on our feed.
Video: How To Install Super Touring Wheels
About Fifteen52 Super Touring Series Wheels
Meticulously balancing style and performance without compromising on quality, we sought to encapsulate the essence of Super Touring. The core philosophy of Super Touring revolves around widely available cars, limited modifications, and a focal point on the raw skill and ability of the driver. This simple philosophy inspired us to design a line of wheels that would exude motorsports-inspired simplicity and nostalgia to make a statement with a clean, "less is more" approach.
Let's take a look at what makes each design unique:
The Apex wheel, boasting a seven-spoke mesh design, ensures optimal caliper clearance for
enthusiasts with big brake kits while the Chicane wheel flaunts a flat face and rolled-back spokes, providing depth and a captivating framework to showcase those impressive brake setups.
For those seeking to maximize style without compromising on weight, the Comp Wheel, with its
split 5-spoke design, pays homage to the iconic no-nonsense aesthetic of the era while weighing
just under 21 pounds, making it the lightest wheel in the Super Touring line.
For a more classic and cleaner look, Fifteen52 offers the Podium and Tarmac EVO wheels,
exuding minimalist vibes while embodying the coveted motorsports-inspired finish, enhanced by
the signature Super Touring Lug Cap System.
The Fifteen52 Super Touring line fuses form with function, perfectly merging racing performance with street style to pay homage to the series that ignited our love for all things motorsport and we hope that you love your new wheels as much as we do. Welcome to the club.


